 |
 |
 |
 |
 |
 |
|
|
|
|
|
|
|
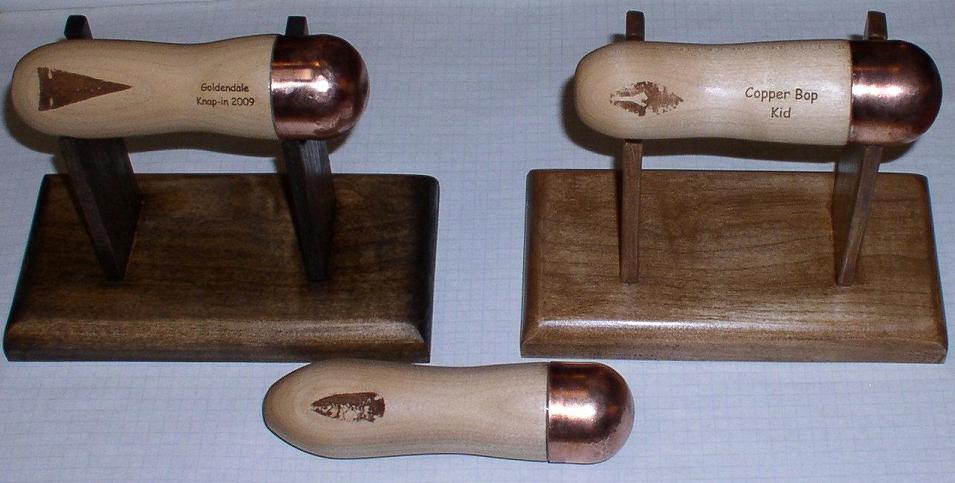
How to Make Copper Cap Boppers1 By James C. Keffer
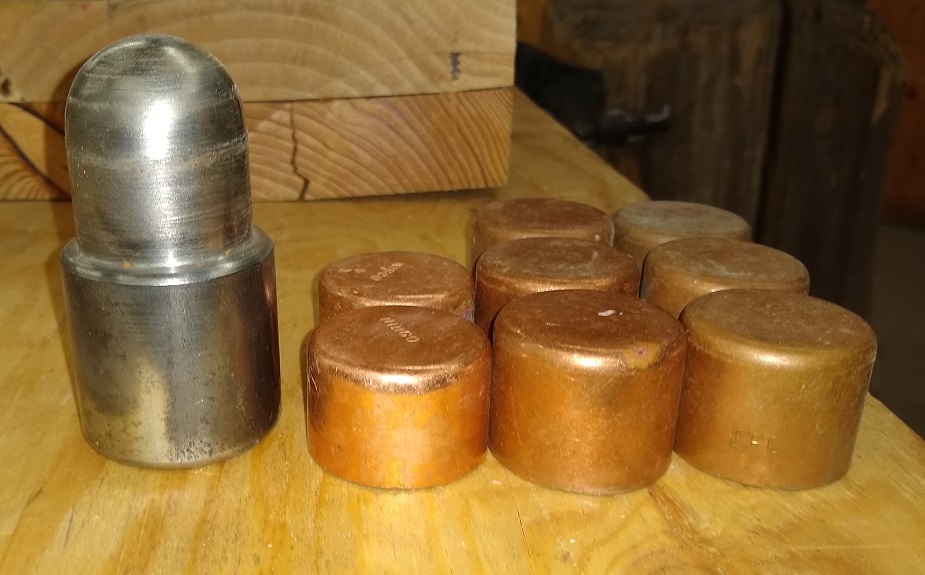
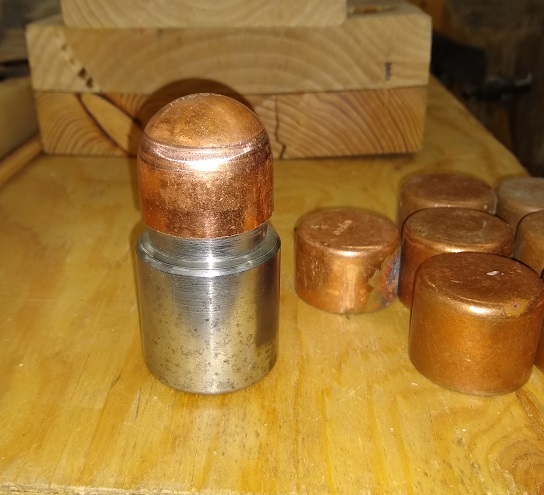
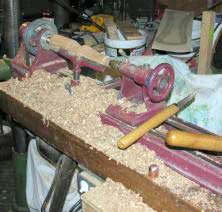
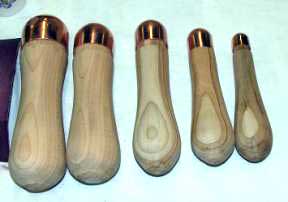
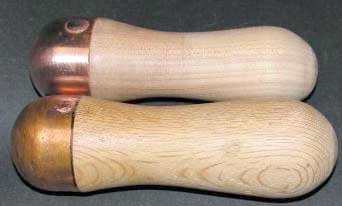
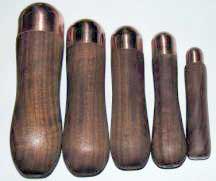
Materials: 1. Copper plumbing caps, sizes 1/2" to 2"* (available at most major hardware stores). Tools: a. Example of doming anvils (homemade). i. 1/2" and 3/4" round bar with rounded ends. ii. Hitch balls rounded to size, 1-1/2" and 2". iii. Ball peen hammer 1" (1-1/4" not shown). 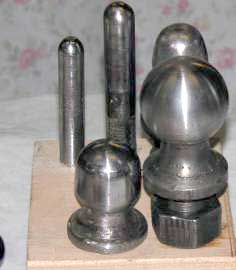 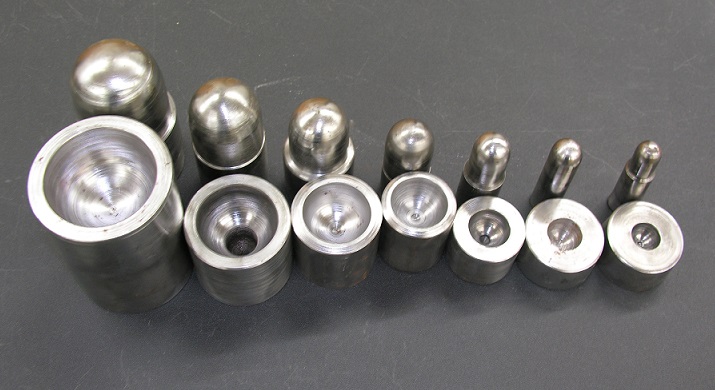 2. Hammers for doming, ball peen or auto body hammers. 3. Wood lathe or carving tools for handle. 4. Pot to melt lead in, burner with which to melt lead (propane torch, propane burner or a gas stove will work). 5. Mixing cup and stirrer for epoxy. 6. Clamps for holding caps to handles while epoxy dries. 7. Paint brushes for applying wood finish. 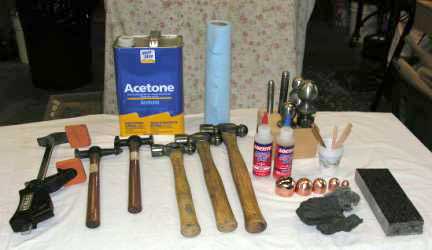 Procedure: 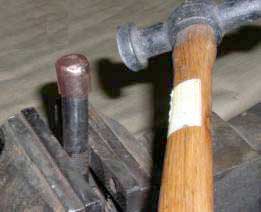  The objective is to get the copper cap as round and smooth as possible. The more round the cap is the better control you'll have in striking flakes. You want to be able to strike the rock with a single point of the bopper end as shown below. 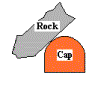 First, select the doming punch for the copper caps. Note the difference in caps, the ones on the right are taller and will have more area to either add more lead or suface area to glue.
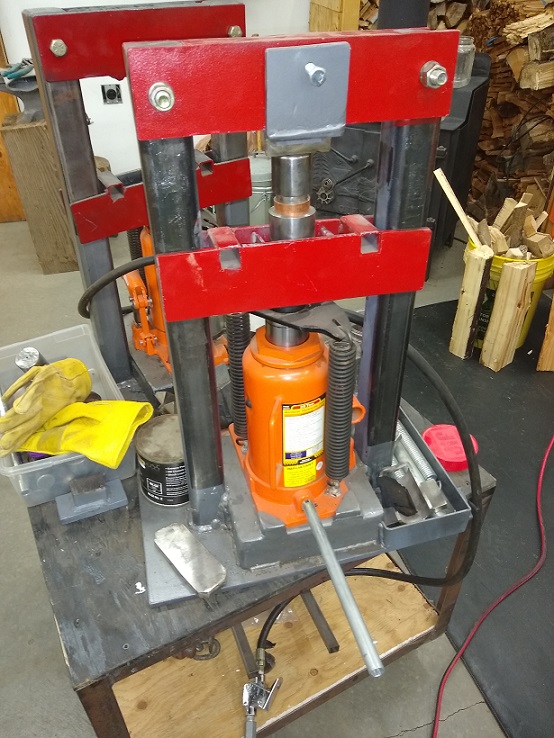
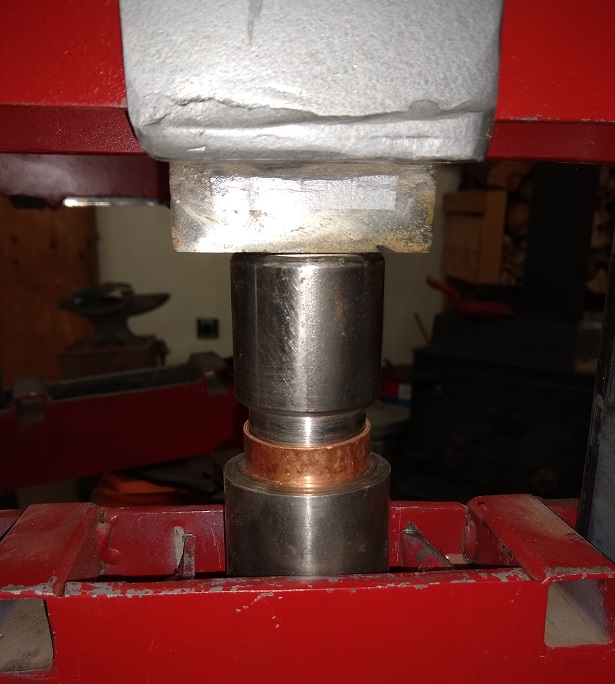
This is the Air-Over-Hydraulic Press I built and use to press the domes on the caps. I prefer to use the press as it says wear and tear on the punches caused by hammering
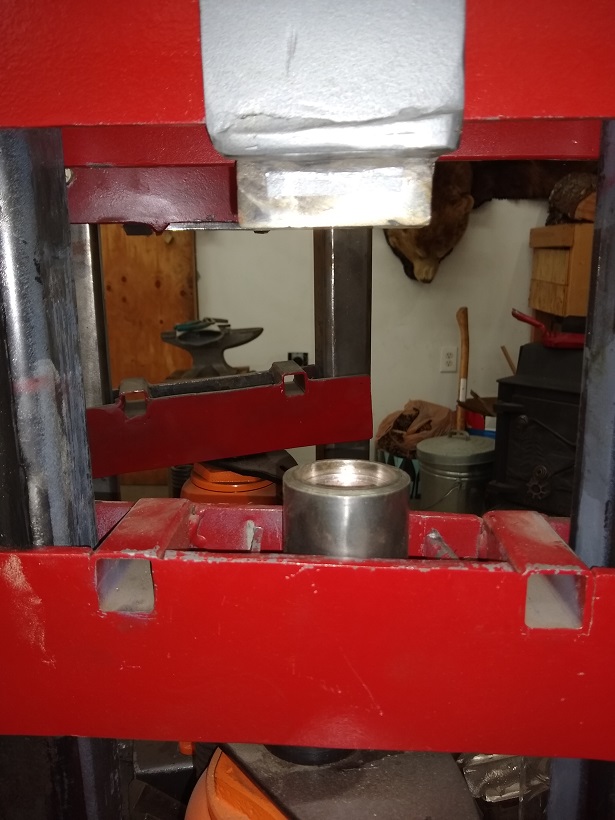
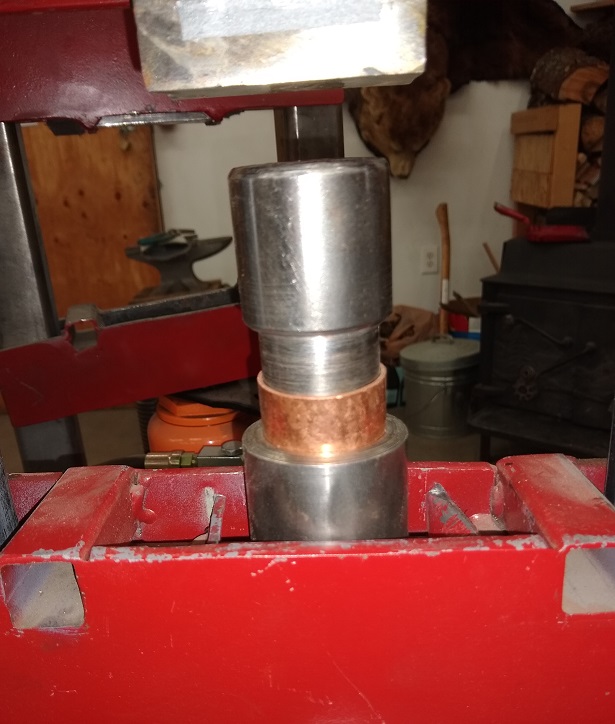
Doming block in the Press
Fit the cap in the block
Fit the punch into the cap
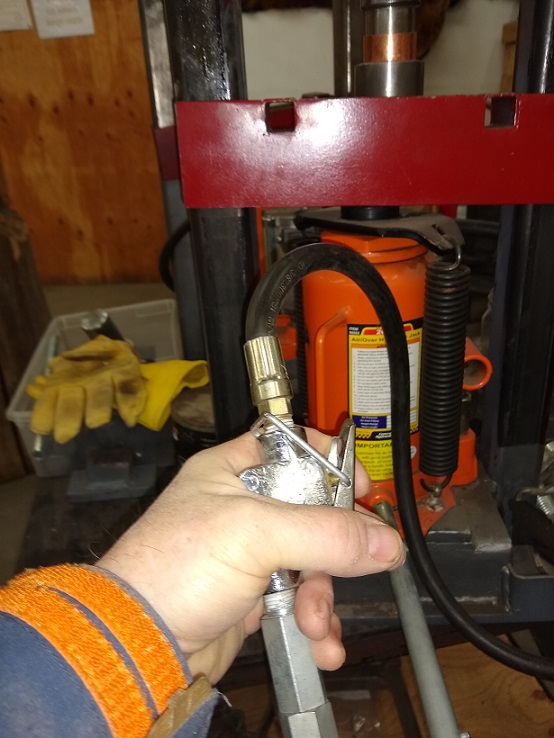
Press the air actuator on the press
Voilà - perfectly domed cap every time!
Filling with Lead Alloy - I make a harder lead alloy by adding about 10% zinc. Zinc weights about 80% as much as lead but is much harder.
Pure lead is a 5 on the Brinell Hardness scale, my lead alloy is 35 on the Brinell Hardness scale as tested by a Lee Hardness Tester. The harder lead is less likely to deform, especially on harder rock.
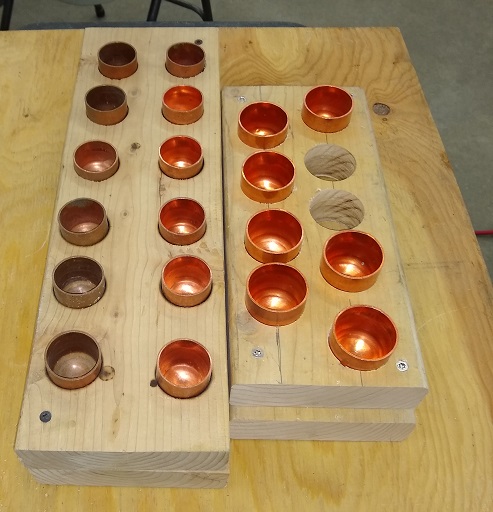
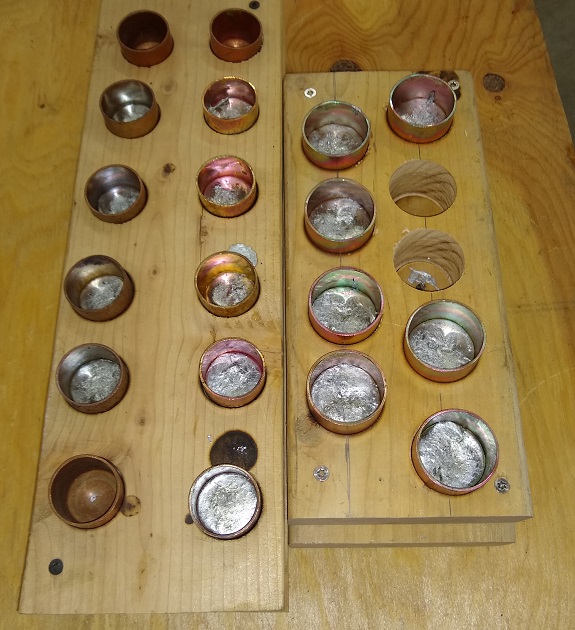
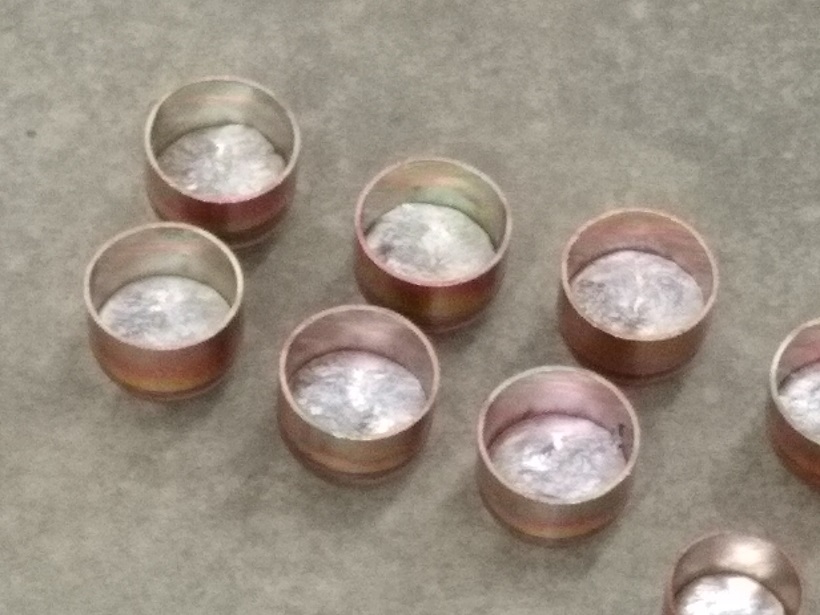
I use wood block to hold the caps when I pour the lead. The block allow me to level the caps and get a consistent, balanced weight! For the larger caps I place them in a vice and level them.
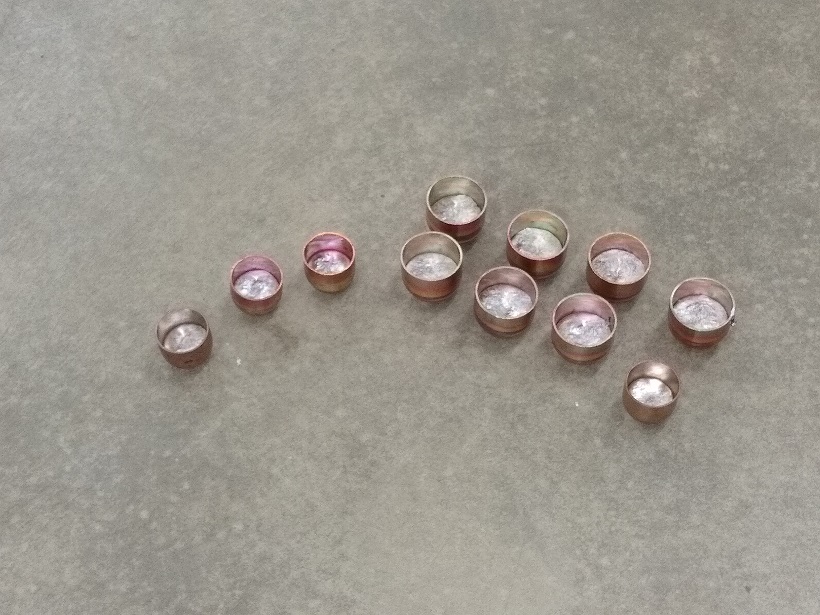
To test that the lead is even in the cap I test them to see if they will stand upright without tipping:
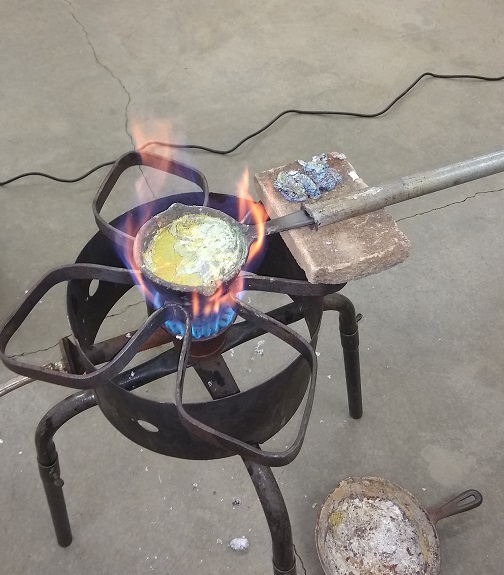
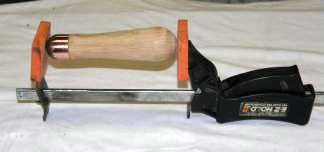
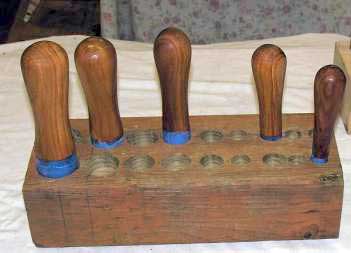
Next clean the inside of the cap with sandpaper or a small sandblaster (I use either a small cabinet sandblaster or an inexpensive siphon sandblaster). 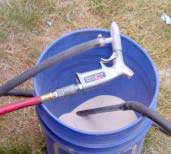 Level the cap and secure (I use a vice and bubble level). 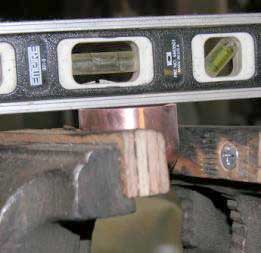 Then melt some hard lead/lead alloy and pour into the cap. Leveling the cap helps to balance the weight distribution of the lead creating a more consistent bopper. sufficient area on the handle and inside the cap for the epoxy to adhere and also places the weight forward making the bopper more efficient at delivering the energy to the platform on the rock. 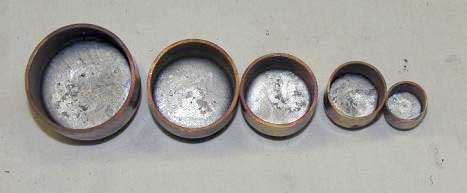 Let the cap/lead cool. There is a high degree of probability that the lead will not adhere to the copper, particularly if using hard head. I find the easiest way to secure the lead to the cap is with epoxy applied when attaching the cap. lead. This doesn't work as well with hard lead containing either zinc or antimony. using a blunt punch (or carriage bolt), hammer the lead to where is swells within the cap thereby creating a tight fit. Again, this also doesn't work as well with hard lead. Since epoxy secures the lead to the cap and the hardened lead doesn't deform, I prefer to use harder lead and epoxy. any residue or glazing cause by the hot lead. This will help insure the epoxy has the best opportunity to create a strong bond. personal preference but most are usually 3-5 inches in length and made of hard wood. Oak, walnut, maple, alder, fir or any other wood that does not contain oils (such as teak which does not take glue well) will work for a handle. A wood lathe allows for fast and easy turning of custom-fit handles. A variety of shapes, Turning a handle on a wood lathe: Checking the fit: Mix a good two-part epoxy according to the directions. Use only enough epoxy for the Liberally coat the inside of the cap (if using the epoxy to secure the lead, coat the entire Clamping the cap: One the finish is dry you have a bopper! Drying Boppers (a drying block helps!): All that is require to maintain the boppers is to occasionally re-seal the handles with your finish of choice. Repair: When a copper cap wears through - and if you use it a lot - it will, you can remove the cap from Potential Problems: From what I've observed the primary reasons for caps becoming loose: 2. Too smooth surface on cap/handle. Solution - roughen the inside of the cap with sandpaper 3. Wood shrinkage - wood shrinks or expands with humidity. Solution - seal the handle with 4. Too much lead in the cap resulting in insufficient glue surface area. Solution - fill the cap just to the top of the domed area. 5. Too tight of a fit between cap and handle, not enough glue area - solution - make sure the gap 1Bopper Cost (as of 9/27/15) Material Cost Making boppers can be cost effective - IF you already have most of the materials on hand. Otherwise it can be much less expensive to purchase a bopper or set of boppers than make them yourself. The following is a material cost breakdown of making a set of 5 boppers, sizes ½” , ¾”, 1”, 1¼” 1½”. This is the material cost for the least amount of material you can reasonably purchase at your local hardware store – most cost come from Home Depot. Although the amounts and types of materials are the least cost, you will end up with more than you need, especially polyurethane and epoxy. Unfortunately purchasing smaller amounts may not be possible or at least practical. Also scrap lead, if pure lead, is too soft. It needs to contain an alloying metal like tin (wheel weights) or zinc or antimony. Each of these alloying metals can add an additional cost. 1. Polyurethane (water-based, water clean-up)– ½ Pint (water clean-up) $5.982. Copper Caps a. ½” = $0.63 b. ¾” = $1.36 c. 1” = $2.91 d. 1¼” = $4.25 e. 1½” = $6.12 Total = $15.27 3. Chip Brush 1” Economy = $0.97 4. Scrap lead 3 lbs @ $1/lb = $3.00 5. Sand Paper 9 in. x 11 in. a. 80, 150, 220 Assorted Grits Advanced Sanding Sheets (6-Pack) $6.97 6. Steel wool a. 12 pad Steel Wool, Coarse, Medium, Fine $3.98 7. Epoxy a. Loctite 8 fl.-oz. Professional Job Size Epoxy $15.67 8. Acetone (cleanup) 1-pt = $4.97 9. Paper towels (cleanup) Basic 1-Ply White Paper Towels $1.00 Total cost of materials1 = $57.81 This does not include the cost of sandblasting sand that I use to clean and roughen the inside of the caps to insure good glue-up. Silica sand is $8.47/100 lbs Labor Cost It takes about 2-3 hours of actual labor time to make a set of five boppers. This includes time for doming the caps (assuming one has doming blocks/punches), melting lead, pouring the lead, sandblasting the caps, turning and sanding the handles, gluing and clamping the caps to the handles, applying the three coats of polyurethane and sanding with steel wool in between coats. This does not include the time it takes for the lead to cool or the polyurethane to dry. It also does not take into account the amount of time or the cost it takes to get the materials. At the Federal minimum wage of $7.25/hour the cost of labor would be about $18.12 (2.5 hours of labor).Total cost for a set of 5 boppers - $75.93 |
|
©2010 J Keffer |