|
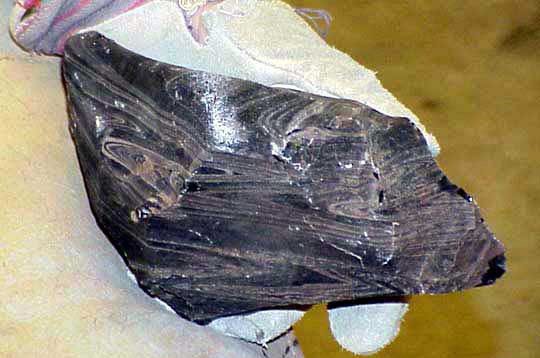
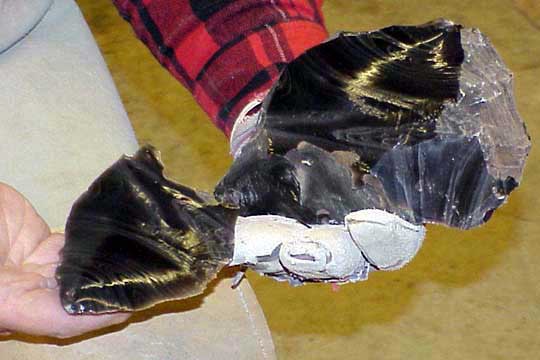
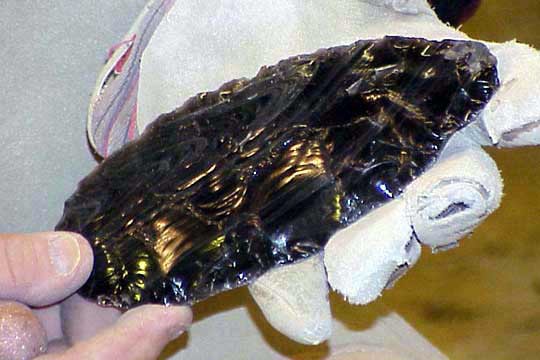
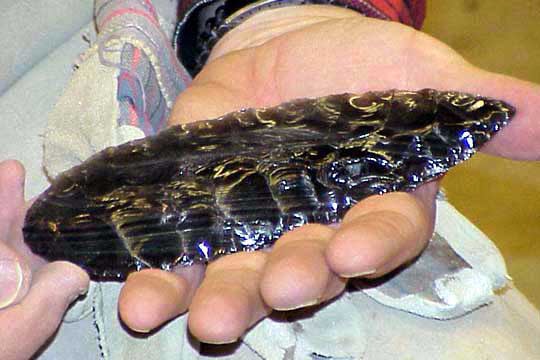
Here's the actual theory put into action. Doc Higgins is holding a piece of "Silver Sheen" obsidian (named because of the gray layers in it) that he's going to turn into a seven inch blade. This is a large, angular and knobby piece of obsidian, a naturally occuring volcanic glass. Native Americans favored this material for stone tools, using it whenever they could obtain it.
Note the heavy leather glove on his left hand, and the thick leather pad on his leg. The flakes he'll be removing are said to be the sharpest edge known to man. Because of the conchoidal breakage characteristics of obsidian, the edge produced is feathered out to an edge one molecule thick, far sharper than the best surgical steel. |
|
|
|
|
|
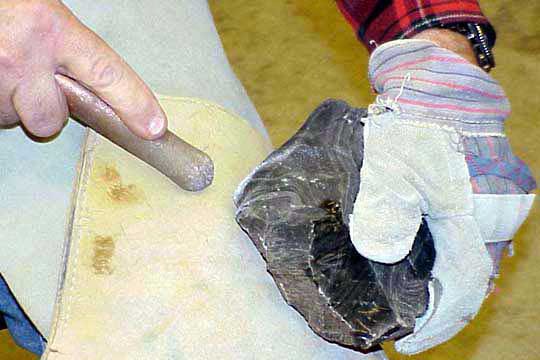
Here Doc's about to take the first in a long series of flakes from the obsidian. He's using a solid copper bopper here, and will be hitting about one third of the way up from the bottom of the edge nearest the bopper. The flake will detach from the uderside of the stone. By controlling where he hits the stone, the angle he holds it, the angle he strikes it at, and the force of the blow he will gradually remove unwanted portions, resulting in a beautifully flaked blade with matching flake scars. He's been doing this since about 1990, and is self taught. I've
(Tom) been doing this for about two years, and can produce blades only half the size Doc can, and not nearly as pretty. I also break quite a few. For me, a tragic case of theory wildly outstripping performance.
While anyone can learn to knap successfully, truly beautiful work requires lots of practice and extreme dedication. |
|
|
|
|
|
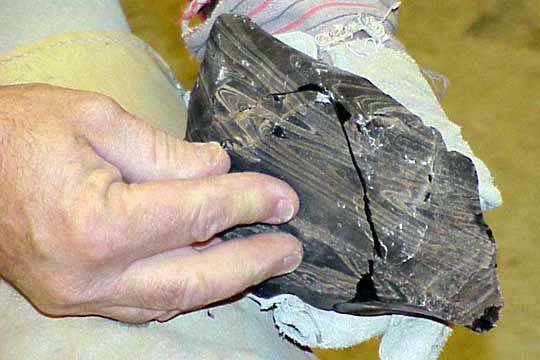
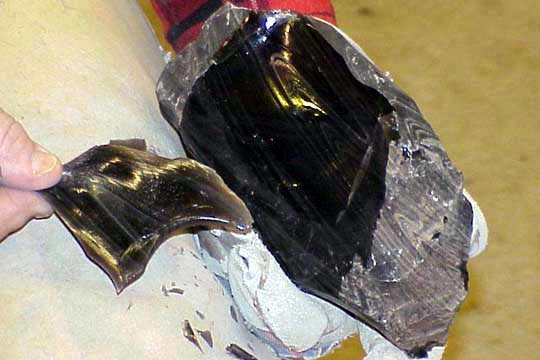
Here Doc has struck off the first large flake and is holding it in the position it came from. You can see the edges as dark black lines. After studying the rock carefully, he has chosen this particular corner because of the ridge you see running under his thumb. Flakes tend to follow ridges quite well, and a skilled knapper can direct which direction a flake will run |
|
|
|
|
|
Here is the same flake removed from the rock. Note that it is a portion of that same spall cone we looked at in the beginning when a BB hits plate glass. Doc will simply remove more portions of similar cones at places (and sizes) of his choosing until he ends up with the desired results |
|
|
|
|
|
Here Doc has removed the second flake, overlapping the first and along the edge ridge he created with the first flake. |
|
|
|
|
|
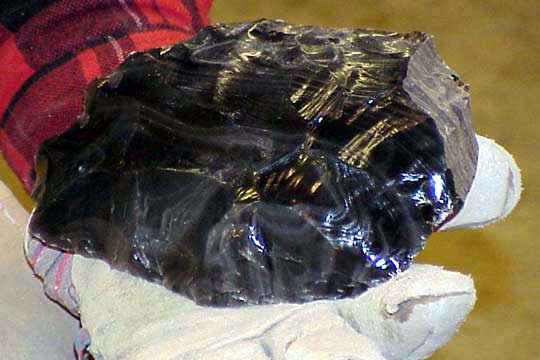
Here's the rock after Doc has carefully removed almost all of the outer layers (the cortex). Note a little of it still remaining at the right hand end. The cortex is highly weathered and doesn't have that characteristically shiny obsidian surface.
The rock is becoming more and more convex in cross section, which is Doc's ultimate aim. Flakes will travel very well over a convex surface, and convex blades have the best characteristics of both strength and sharp edge for durability. |
|
|
|
|
|
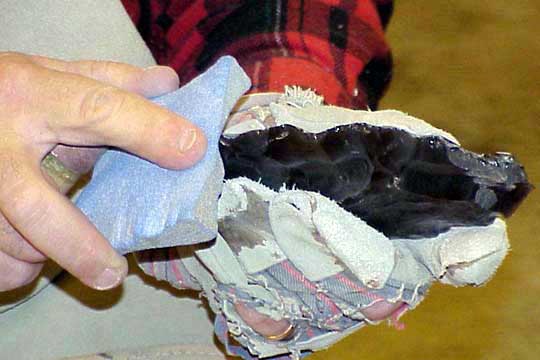
As the edges become thinner and sharper, Doc is paying particular attention to thickening the incredibly sharp edge by abrading it away with a coarse stone. Modern knappers use pieces of grindstone, where prehistoric knappers would have used coarse sandstone. Thickening the edge allows the force of each blow to transfer efficiently into the stone, resulting in a clean break, in the desired place, rather than allowing the sharp but weaker edge to crush. Crushing either fails to detach a flake, or only allows the break to travel part way into the stone, then break off leaving an ugly ledge which will be very difficult to deal with later (a common beginner's mistake).
A not to be overlooked advantage to abrading the edge is the stone is much safer to handle. Freshly flaked edges are so sharp you can easily cut yourself and not even notice until the area around you begins to fill with red fluid! |
|
|
|
|
|
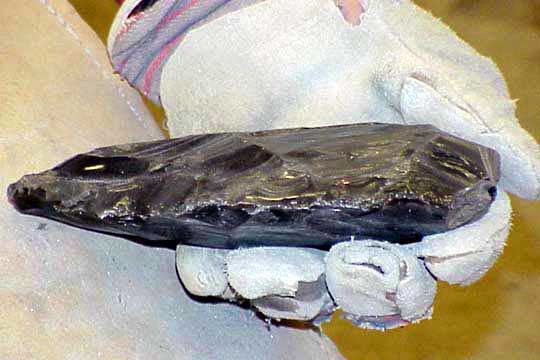
Here's the rock several series of flakes later, at a stage called a "biface." This is the stage at which Native Americans would have used to transport the stone for trading or taking home. Rather than carrying a lot of waste stone (remember, no pickup trucks back then), Native Americans would have reduced the ra w stone to this stage, and carried them away in baskets. From this stage, a large knife blade or spear point could be produced at will, and most of the subsequent waste flakes taken off would be recycled as small cutting tools or arrow points. |
|
|
|
|
|
Here it is from a side view. At this stage, the rock is at least half the weight of the original. |
|
|
|
|
|
Here's the next stage. Doc has continued to go around the edges and on both faces of the stone removing flakes to further refine the shape. He's been paying especially close attention to removing flakes to help thin the stone. |
|
|
|
|
|
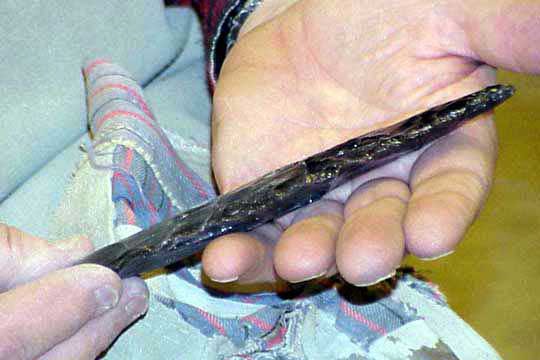
The same stage edge on. Note how much thinner it is. |

|
|
|
|
|
Several more rounds of thinning and shaping flakes. Note how much it is starting to look like a knife blade.
|
|
|
|
|
|
Same stage edge on |
|
|
|
|
|
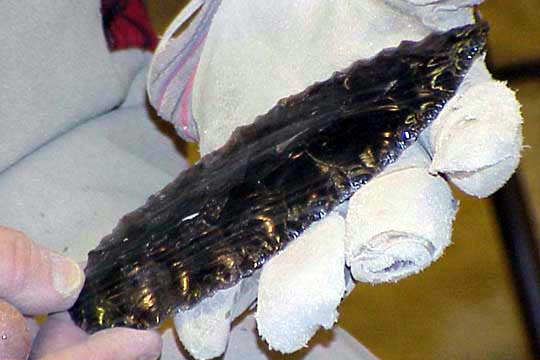
More refinement. Doc's carefully programmed flake removals are starting to show up regularly spaced and matching with flakes from the opposite side. Knappers would refer to these as well spaced flake scars. Nicely patterned flake scars produce prettier blades, and are often considered a demonstration of the knapper's prowess. |
|
|
|
|
|
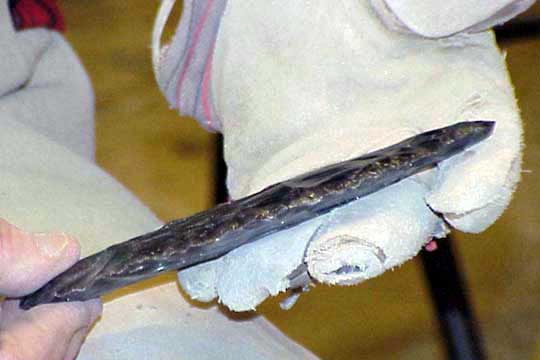
Edge on. Only a few places to fiddle with and we'll be done. |
|
|
|
|
|
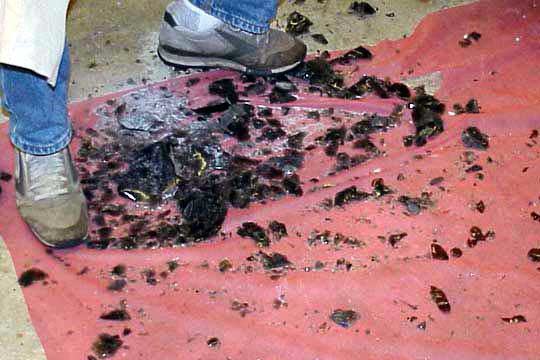
Here's the "debitage" (waste stone) pile left after finishing the blade. Many of these flakes are useable as cutting tools simply by abrading the side held next to the hand (for safety), or to be made into smaller knives, arrow points, drills, scrapers or other tools. This is also the amount of material a Native American trader would not have had to carry when he (or she) took out only biface stage material. |
|
|
|
|
|
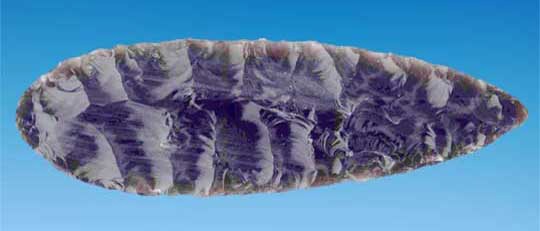
The finished 7 inch blade. Note the evenly spaced flake scars, matching with other scars from the opposite side, and smooth edges. A beautifully knapped knife blade, or with several knotches at the wide end, hafted onto a spear. All told, several hours of intense concentration, and lots of years of practice in the school of hard knocks, cuts, scrapes and jabs. |
|